Archive /
music production

Checkout: Serum synth

serum
Serum

Being a total music tech geek who’s reading Gearslutz and other related forums all the time when not busy making music, mastering it for clients or  playing with plug-ins and DAWs, I thought it might be relevant to start writing about it a little. So here’s a little checkout of the Serum synth by Xfer Records. I won’t go into writing a comprehensive manual or a comparison, but just say how I felt about it. I know there’s numerous reviews out there, but I wanted to do one of my own just go get practice with writing a bit longer as I’m planning to write more for the blog.

I bought Serum recently after demoing it for a while. I don’t dare demo things very often because Continue reading Checkout: Serum synth
Lush oldskool DNB style pad with Serum in 15 seconds

[sorry for the distorted sound – that’s Instagram messing it up, not me!]
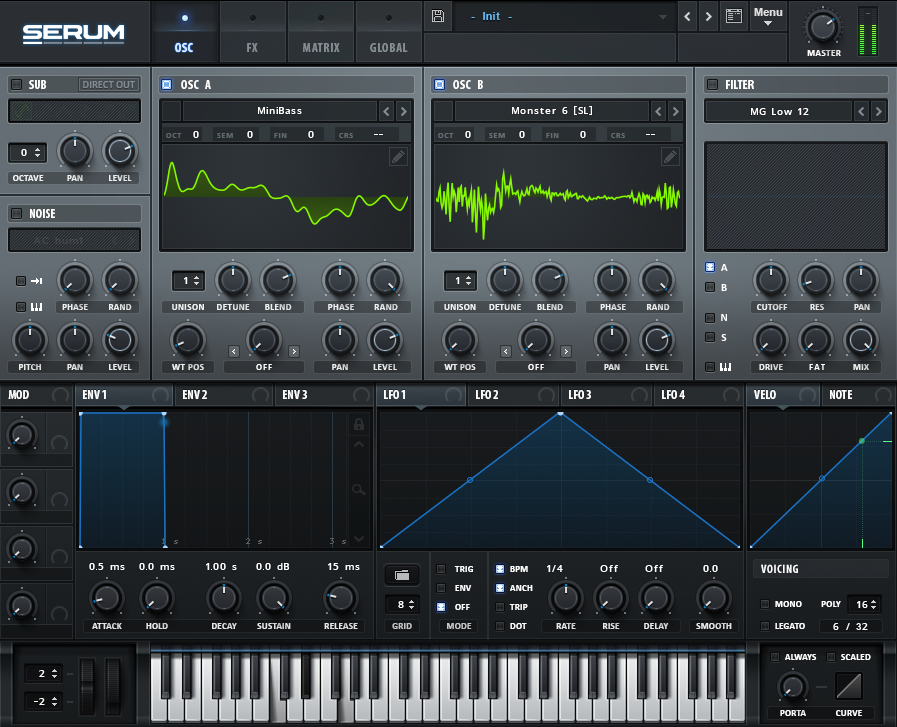
• Select an oscillator; here I’m going for “Mellow But Instable” of the analog ones
• crank up the unison up to 16
• lessen the unison detune amount so it doesn’t sound too out of tune
• add reverb from FX
• set the stack from Global settings to 12+7(1x); this means that every 2nd unison voice will play up an octave (0, +12, 0, +12, 0 +12, etc), and a fifth is also used in the layering of sounds, so you’ll get a really rich sound
• adjust filter to taste
• play a chord (C2–D#2–G2 heard here)

There you go!

About high-passing your beats

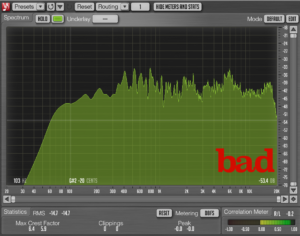
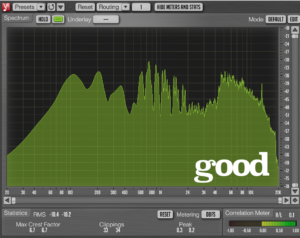
bad good

Every now and then I receive songs for mastering that sound a bit too hollow in the beat department. Often, the problem lies in the beat that’s been high-pass filtered too high/steep.
The pics show how it’s roughly supposed to look if you have the necessary meat in there (good) or if it’s been high-passed too much (bad), ending up in a hollow-sounding beat. Both pics are from songs when there is no bassline happening; it’s good to check the beats without bass, too. The kick area will peak depending on where your kick hits, but regardless, you shouldn’t have that gap there (as in the bad pic).
Earlier I blogged about high-passing your song and getting your sub bass right, which both relate to the same matter as well and were essentially about how it’s supposed to look when you have bass going on.
Even though listening is key, tools such as Voxengo SPAN are great tools in this matter.

“Is it OK to run tracks red in a DAW?”

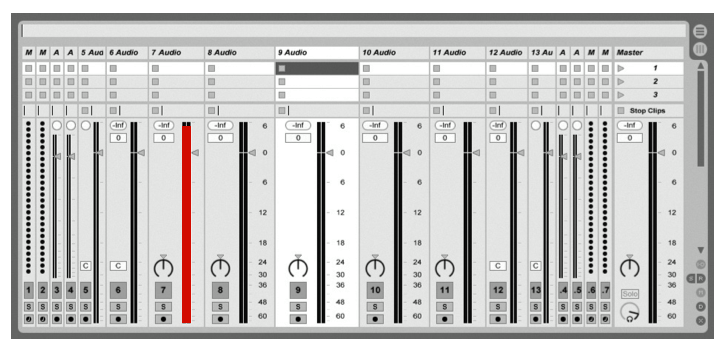
11265301_759345654211173_2225516956863981767_nI get asked and see people ask on the forums whether it’s safe to drive channels red in a DAW. Some people say yes, some say no. Well, here’s the fact:

In some DAWs at least, it’s perfectly OK to run the tracks red if the DAW has what’s called a 32-bit floating point engine. This means you can run individual channels as loud as you want as long as the master isn’t hitting red – and it won’t distort/clip.
You should probably check the manual of your DAW if it has info on the abovementioned engine.

Another thing, however, is running the signal red between plugins; that in general should be avoided (as some plugins can’t handle loud input levels very well). Proper gainstaging never hurts; every time I want to keep the level at bay (especially on the master), I use VU Meter by Hornet Plugins.